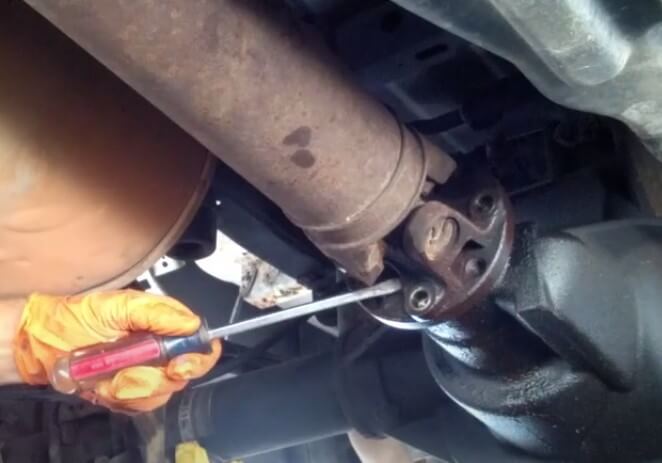
Understanding the Drive Shaft

Before diving into the removal process, it’s essential to have a basic understanding of what a drive shaft is and its role in a vehicle’s drivetrain system. A drive shaft, also known as a propeller shaft, is responsible for transmitting torque and rotation from the engine to the wheels, allowing the vehicle to move forward or backward. It consists of a hollow metal tube with universal joints at both ends to accommodate movement and flex.
Tools and Materials Needed
The following tools are required:
- Jack and Jack stand: lifting the vehicle.
- Socket wrench set: To remove bolts.
- Torque wrench: For precise tightening of bolts during reinstallation.
- Pry bar: To help with the removal of stubborn components.
- Penetrating oil: For loosening rusted or stuck bolts.
- Safety goggles and gloves: To protect your eyes and hands from debris and chemicals.
Step-by-Step Removal Process
1. Lift and Secure the Vehicle:
Using a jack, lift the vehicle off the ground and support it securely with jack stands. Make sure that the vehicle is stable and doesn’t move at the time of the removal process.
2. Locate the Drive Shaft:
Identify the drive shaft underneath the vehicle. Depending on the vehicle’s configuration, it may be located at the front, rear, or center of the vehicle.
3. Disconnect the Drive Shaft:
Begin by removing any components obstructing access to the drive shaft, such as heat shields or exhaust components. Then, locate the bolts securing the drive shaft to the transmission or differential.
Marking the Drive Shaft and Removing the Bolts
- Marking the Position: Before removing the drive shaft, it’s crucial to mark its position relative to the transmission and differential. Use a marker or paint to make clear reference points on both the drive shaft and the corresponding flanges or yokes. This will aid in proper alignment during reinstallation, minimizing the risk of drivetrain vibrations.
- Removing Bolts: Once the drive shaft is marked, proceed to remove the bolts securing it to the transmission and differential. Utilize a socket wrench to loosen and extract the bolts carefully. Keep track of any accompanying hardware associated with the bolts.

Eliminating the Drive Shaft Flange
- Identify Flange Components: With the bolts removed, you’ll now have access to the drive shaft flange. Identify any retaining clips, bolts, or other fasteners securing the flange to the drive shaft.
- Remove Retaining Hardware: Using appropriate tools such as a pry bar or wrench, remove any retaining clips or bolts holding the drive shaft flange in place. Take care not to damage the flange or surrounding components during this process.
- Separate Flange from Drive Shaft: Once the retaining hardware is removed, gently separate the drive shaft flange from the drive shaft itself. Be cautious not to apply excessive force, as this could cause damage to the drive shaft or flange.
Taking Out the Drive Shaft
- Slide Out the Drive Shaft: With the drive shaft flange eliminated, carefully slide the drive shaft out of the transmission or differential housing. Take care not to damage any surrounding components or surfaces during this process.
- Support the Drive Shaft: As you remove the drive shaft, ensure it is adequately supported to prevent it from falling and causing injury or damage. Use a jack stand or have a helper assist you in supporting the drive shaft’s weight.
Reinstalling the Drive Shaft and Other Components
- Inspect and Clean: Before reinstalling the drive shaft, thoroughly inspect it for any signs of damage or wear. Clean the drive shaft and surrounding components using a rag and degreaser to remove any dirt or debris.
- Align and Install: Carefully align the drive shaft with the transmission and differential, ensuring that the reference marks made earlier are matched up correctly. Slide the drive shaft back into place, taking care not to force it or cause misalignment.
- Reattach Flange and Bolts: Once the drive shaft is properly seated, reattach the drive shaft flange using the original retaining hardware. Ensure that all bolts are tightened securely to the manufacturer’s specifications using a torque wrench.
- Test for Proper Function: After reinstalling the drive shaft, conduct a thorough test to ensure that it operates smoothly and without any unusual noises or vibrations. If any issues are detected, revisit the installation process to identify and rectify any potential problems.
By following these steps, you’ll be able to effectively remove, reinstall, and eliminate the drive shaft flange, ensuring proper alignment and functionality of your vehicle’s drivetrain system.
4. Inspect and Clean
Once the drive shaft is removed, inspect it for any signs of damage or wear, such as worn universal joints or dented tubing. Clean the drive shaft and surrounding components with a rag and degreaser to remove any dirt or debris.
Safety Precautions
- Always wear safety goggles and gloves when working on vehicles to protect against injury.
- Use caution when working underneath a vehicle, ensuring it is securely supported with jack stands.
- Avoid working on hot components to prevent burns.
- Use penetrating oil to loosen rusted or stuck bolts to avoid damaging surrounding components.
- Double-check that all bolts and components are properly tightened before operating the vehicle.
Conclusion
Removing a drive shaft is a task that requires precision and attention to detail. By following the steps outlined in this guide and taking appropriate safety precautions, you can successfully remove a drive shaft from your vehicle without incident. Remember to consult your vehicle’s manual for specific instructions and always seek professional assistance if you’re unsure about any aspect of the process.
Leave a Reply