Everstart jump starters are super useful at the time your car battery dies. It gives your battery the boost that needs to start your engine. It’s like having a superhero for your car! Everstart jump starters are safe, so you don’t have to worry about anything going wrong.In times of emergency it is always there for you.
The EverStart User Manual The ultimate guide. This complete manual provides detailed instructions and safety guidelines so that you can use the product safely and effectively.
Having a range of features, the EverStart Jump Starter is fully filled with a built-in 120 Volt AC Charger, USB charging ports, and a 2-LED white area light. When you need to charge your devices or in case of emergency, this jump starter will do the work.
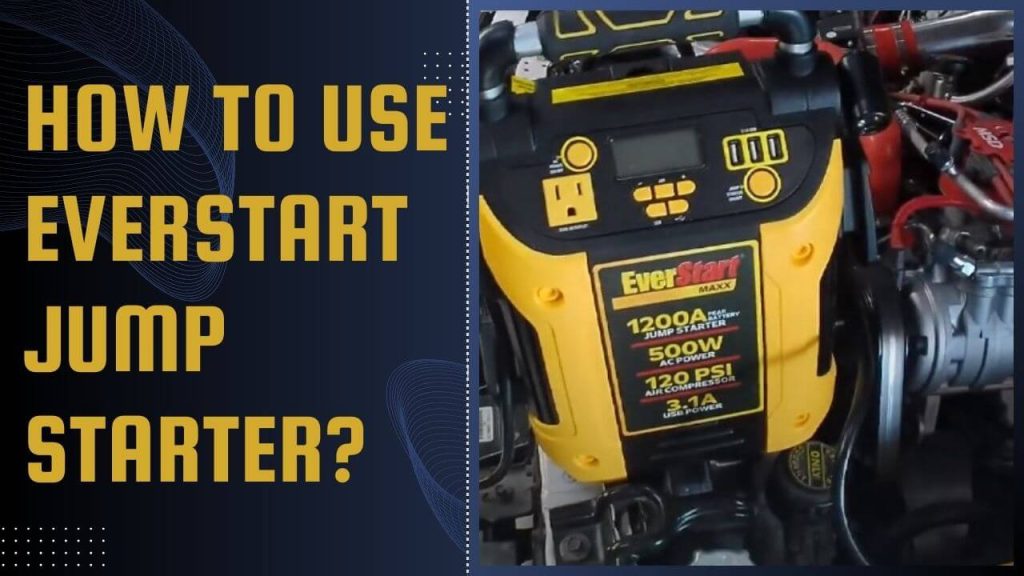
How to Use Everstart Jump Starter
Here’s a comprehensive guide to utilizing this indispensable tool effectively:
Step 1: Preparation
Before using it, you need to make sure that the jump starter is charged. You need to charge it once or more in six weeks.
~Charging the Everstart Jump Starter
To charge the Everstart jump starter, follow these steps:
1: Check Battery Level
Before initiating the charging process, it’s essential to check the current battery level of your Everstart Jump Starter. Most models come equipped with LED indicators or digital displays to indicate battery status.
2: Connect to Power Source
Using the provided charging cable, connect your Everstart Jump Starter to a suitable power source. This can be a standard wall outlet, USB port, or vehicle accessory outlet.
3: Monitor Charging Progress
Once connected, monitor the charging progress through the LED indicators or digital display. A flashing or solid light typically indicates that the device is charging.
Once the unit is properly connected to the AC power source, the LCD screen will display the following:
- The bars on the Battery Status Icon represent the charge level of the l battery. The bars indicate charging.
- The backlight will turn on for 10 seconds (only).
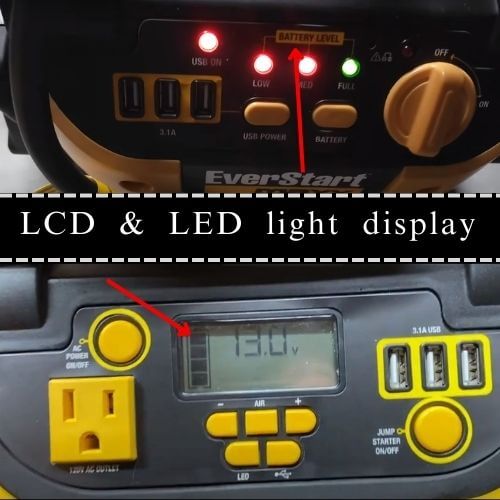
- Full Capacity: If the battery charge level is at full capacity, four solid bars will display on the Battery Status Icon.
- Partial Charge: If the battery is partially charged, two or three solid bars will display on the Battery Status Icon.
- Nearly Empty: If the battery is nearly empty, only one solid bar will display on the Battery Status Icon. This indicates that the unit should be charged at this time.
- Completely Empty: If the battery is completely empty, four blank bars will display on the Battery Status Icon. In this state, the unit MUST be charged immediately, or the unit’s built-in low voltage protection will activate. The empty Battery Status Icon will flash for a short period of time before the unit automatically shuts down. The battery must be charged for the starter to do work.
NOTE:
The initial AC charge should last for 24 hours or until the Battery Status Icon displays four solid bars. Manufacturer recommends recharging the battery at least every 30 days and after each use.
If you’re aware that the unit is discharged, but the battery icon shows four solid bars as if it’s fully charged when connected to a charging power source, this might be because the internal battery has high impedance. In such cases, the manufacturer recommends leaving the unit charging for a period of 40 hours using the built-in AC charger before use.
4: Complete Charging Cycle
Allow the Everstart Jump Starter to charge fully before disconnecting it from the power source. The time required for a full charge may vary depending on the model and battery capacity.
5: Safely Disconnect and Store
Once fully charged, safely disconnect the charging cable and store your Everstart Jump Starter in a secure location. Ensure that it is easily accessible for future use, whether in your vehicle or backpack.
~Storage Recommendations
Proper storage of the Everstart jump starter is crucial for maintaining its performance and longevity. Here are some tips for storing your jump starter:
- Moderate Temperature: Store the jump starter in a moderate temperature environment. Extreme temperatures, whether excessively hot or cold, can negatively impact the battery life and overall functionality of the device.
- Dry Location: Avoid storing the jump starter in areas prone to moisture or humidity, as this can lead to corrosion and damage to the internal components.
- Protective Case: Consider investing in a protective case or carrying pouch to safeguard the jump starter from external damage and environmental elements.
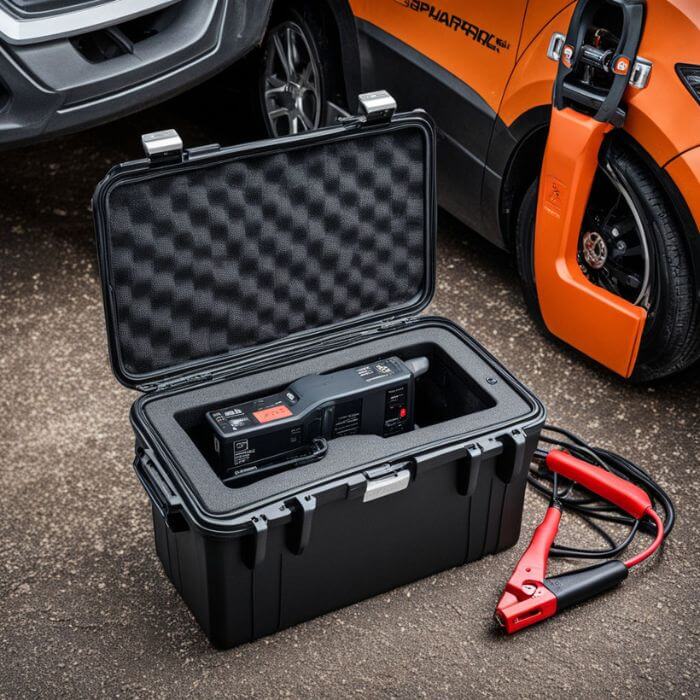
By adhering to these guidelines for charging and storage, you can ensure that your Everstart jump starter remains ready for use whenever you encounter a vehicle-related emergency.
Step 2: Connection
Before proceeding with jump-starting your vehicle, it’s essential to properly connect the Everstart jump starter to the car battery. Depending on the model, Everstart jump starters may come with permanently attached cables or detachable clamps. Follow these detailed instructions for a successful connection:
~Identifying Jump Starter Components:
- Permanently Attached Cables: Some Everstart jump starters feature permanently attached cables with clamps at the end. These cables typically include a red clamp for positive terminals and a black clamp for negative terminals.
- Detachable Clamps: Alternatively, other models may come with detachable clamps. These clamps allow for greater flexibility in positioning and storage.
~Proper Connection Procedure:
For negative-grounded systems, follow these steps for proper connection:
- Attach the positive (red) clamp to the positive ungrounded battery post.
- Attach the negative (black) clamp to the vehicle chassis or engine block away from the battery.
- Avoid connecting the clamp to the carburetor, fuel lines, or sheet-metal body parts.
- Connect the clamp to a robust, thick-gauged metal section of the frame or engine block for secure attachment.
For positive-grounded systems, the procedure is reversed:
- Attach the negative (black) clamp to the negative ungrounded battery post.
- Fasten the positive (red) clamp onto the vehicle chassis or engine block, ensuring it is positioned away from the battery.
- Avoid connecting the clamp to the carburetor, fuel lines, or sheet-metal body parts.
- Connect the clamp to a robust, thick-gauged metal section of the frame or engine block for secure attachment.
~Problem You May Face:
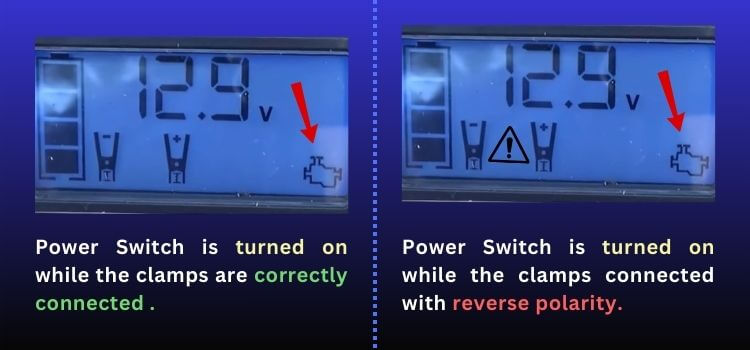
(1) If the clamps are incorrectly connected in terms of polarity, the unit will emit a continuous alarm until the clamps are disconnected. The backlit LCD screen will show the Battery Status Icon, Battery Voltage Indicator, and Clamp Icons. Also, the “+” and “-“ signs, the Arrow Icons, and the Alarm Icon will flash.
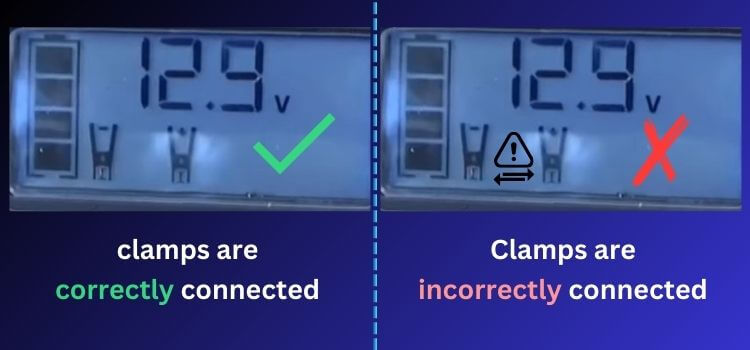
(2) If the Jump Starter Power Switch is turned on while the clamps are connected with reverse polarity, the unit will sustain permanent damage. In such a case, disconnect the clamps and reconnect them to the battery with the correct polarity.
If the Jump Starter Power Switch is activated and the unit detects that the clamps are not connected to a battery, it will emit a two-second warning every 10 seconds. The LCD screen will display the Battery Status Icon, Voltage Indicator, Clamp Icons with the “+” and “-” signs. Also, the Alarm Icon with the Jump Starter Icon will flash . The backlit LCD screen will show the following :
- first turn off the jump starter
- Disconnect the clamps and switch them rightly.
- turn the Jump Starter Power Switch back on.
- Always remember to disconnect the negative jumper cable first,not in case for positive grounded systems
Step 3: Activation
After securely connecting the Everstart jump starter to your vehicle’s battery, it’s time to initiate the power transfer process.
Initiating Power Transfer:
1. Switch On the Jump Starter: Locate the power switch on the Everstart jump starter and toggle it to the “On” position. Depending on the model, some jump starters may have an automatic activation feature that engages upon connection to the battery terminals.
2. Surge of Energy: Once activated, the jump starter will deliver a surge of energy to the car’s battery. This surge is essential for providing the necessary power to initiate ignition and start the vehicle’s engine.
Step 4: Starting the Vehicle
~When the clamps are securely connected, the illuminated LCD screen signals readiness for jump-starting:
- The Battery Status icon, Battery Voltage Indicator, Clamp Icons, and the “+” and “-” signs glow steadily. A flashing Jump Starter Icon confirms proper clamp connection.
- Activate the Jump-Starter Power Switch. Upon activation, a solidly lit Engine Icon signals readiness to start the vehicle. Turn the ignition and engage the engine in 5-6 second intervals until it ignites.
~During jump-starting, the LCD screen displays:
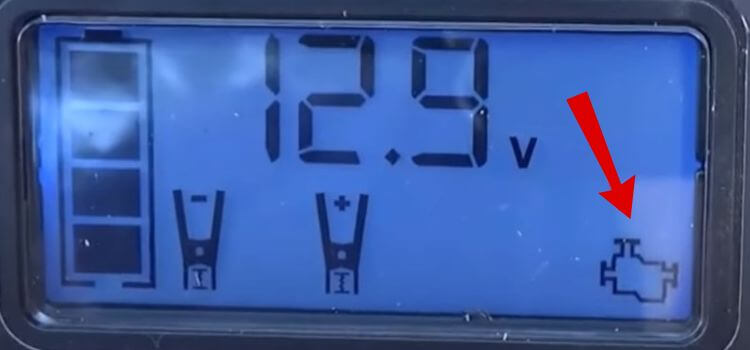
Steadily lit Battery Status Icon, Battery Voltage Indicator, Jump Starter Icon, Clamp Icons, and the “+” and “-” signs, indicating the unit’s engagement in jump-starting efforts.
REMEMBER:
- Avoid Over-cranking: If the engine fails to start on the first attempt, avoid repeatedly cranking the engine. Over-cranking can strain the jump starter and may worsen the situation.
- Wait Between Attempts: If the engine does not start initially, wait for a brief period, usually around 2 to 3 minutes, before attempting to start it again. This allows time for the jump starter to recharge and for any potential issues to be resolved.
Step 5: Repeat if Necessary
If the engine fails to start initially, follow these steps to retry jump-starting the vehicle:
Retry Procedure:
1. Wait and Assess: After the initial attempt, wait for a brief period, typically 2 to 3 minutes, before proceeding. Use this time to assess the situation and ensure all connections remain secure.
2. Secure Connection: Check that the clamps or cables of the Everstart jump starter are securely attached to the car’s battery terminals. Loose connections can hinder the jump-starting process.
3. Repeat the Process: If the engine fails to start on the first attempt, repeat the jump-starting process. Activate the Everstart jump starter and attempt to start the vehicle’s engine again.
Step 6: Post-Start Procedures
After successfully starting the vehicle’s engine, follow these steps to safely remove the Everstart jump starter:
Removal Procedure:
1. Prompt Disconnection: Once the engine starts, promptly disconnect the Everstart jump starter from the battery terminals. This helps prevent any potential damage or electrical hazards.
2. Clamp Removal: Begin by removing the black (negative) clamp from the vehicle’s chassis or negative battery terminal. Ensure a firm grip on the clamp to prevent accidental disconnection.
3. Red Clamp Removal: Next, detach the red (positive) clamp from the positive battery terminal. Exercise caution to avoid contact with any metal surfaces or moving engine parts.
Why Choose Everstart Jump Starter?
In a market inundated with an array of jump starter options, Everstart stands out as a reliable choice for discerning consumers. Here are a few compelling reasons to opt for Everstart jump starters:
- Durability: Everstart jump starters are built to last, boasting robust construction and quality craftsmanship. With proper maintenance, these devices can withstand the rigors of frequent use, providing long-lasting performance and reliability.
- Comprehensive Accessories: Each Everstart jump starter comes equipped with essential accessories, ensuring that users have everything they need to jump-start their vehicles efficiently. From detachable clamps to user manuals, Everstart jump starters offer a comprehensive solution to battery-related issues.
- User-Friendly Design: Whether you’re a seasoned mechanic or a novice driver, Everstart jump starters are designed to be user-friendly and intuitive. With clear instructions and minimal setup requirements, these devices empower motorists to tackle battery emergencies with confidence.
In conclusion, Everstart jump starters are indispensable tools for motorists seeking a reliable solution to battery-related issues. With their high safety standards, portability, and ease of use, Everstart jump starters epitomize convenience and reliability in the realm of automotive accessories.
For those in need of a dependable backup plan for unexpected battery failures, Everstart jump starters emerge as a beacon of hope, ensuring that you’re never stranded on the roadside due to a dead battery. Invest in an Everstart jump starter today and experience peace of mind on every journey.
Leave a Reply